We found no genogram template or stencil in Visio
People often look for a Visio genogram template before they start. On Microsoft Q&A, a Visio MVP answered the question in 2010 by saying that Visio does not come with a genogram stencil, and later users in the same thread were still asking for one. The Visio templates that Microsoft features on its support site cover block diagrams, flowcharts, networks, floor plans and software, and none of them is a genogram or a family tree.
That leaves two honest routes. Draw the symbols yourself with the steps below, or draw the chart in a genogram editor and place it in Visio as a picture. A picture placed in Visio stays a picture. It is not an editable Visio template, and its people cannot be moved one by one.
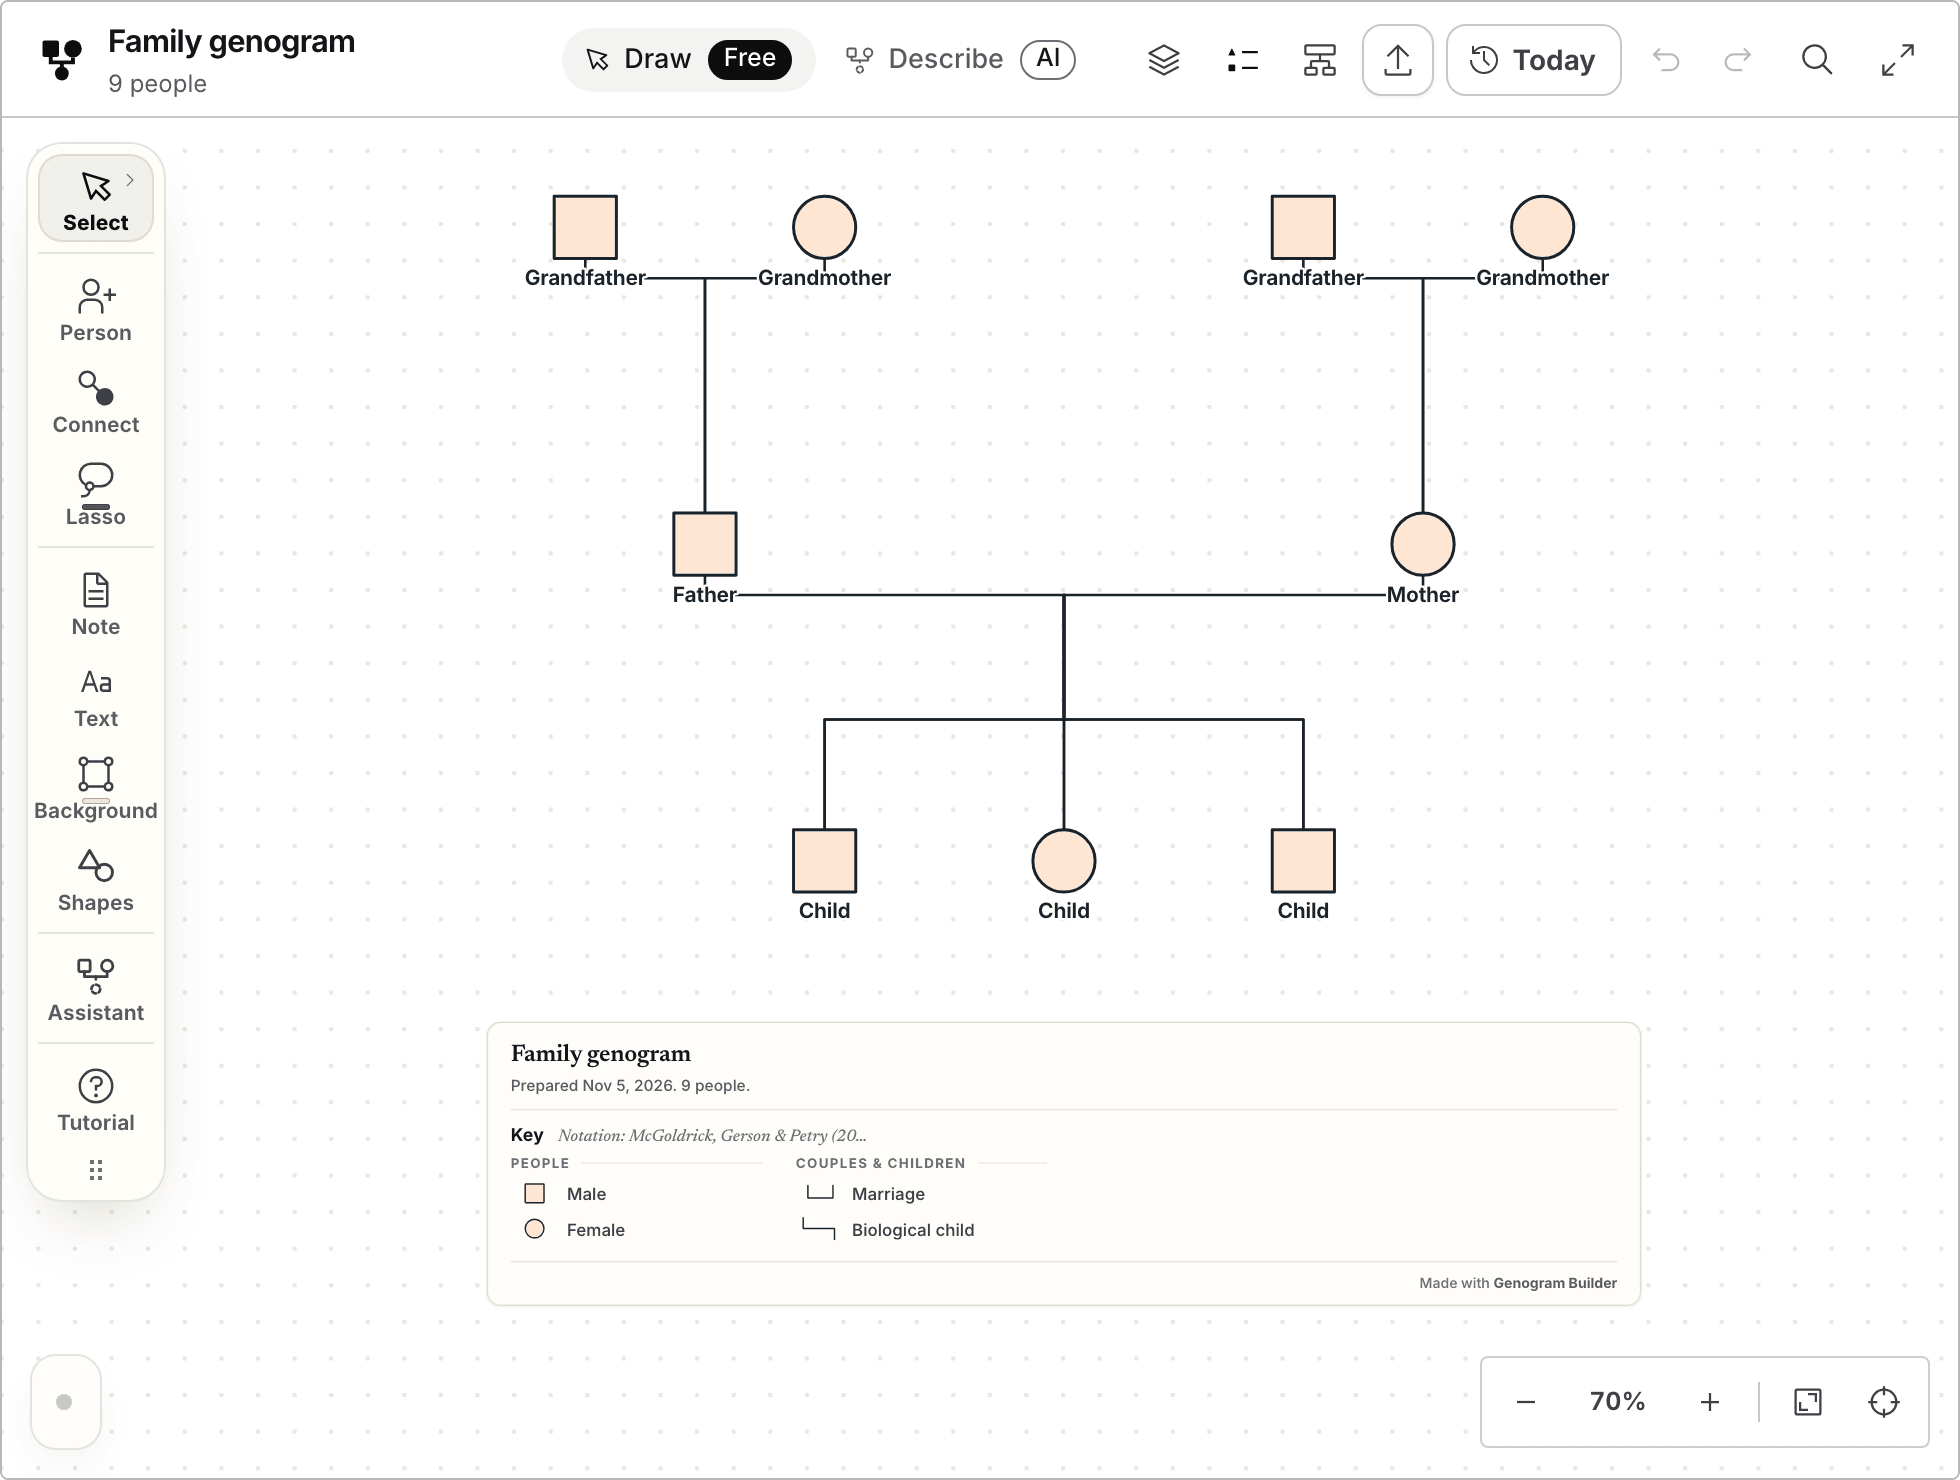
Genogram Builder
Draw the genogram here, then place it in Visio
The editor lays out the symbols, the couple lines and the key, and a free account exports the chart as a picture for your Visio page.
- Opens without an account
- Symbols, lines and key drawn for you
- PNG and PDF with a free account, watermarked
How to draw a genogram in Visio in seven steps
Plan the family on paper first, as rows with the oldest generation at the top. The commands below are named as Microsoft names them for the Visio desktop app on Windows.
- Draw the first person
On the Home tab, in the Tools group, select the arrow next to Rectangle. Choose the Rectangle tool for a man or the Ellipse tool for a woman, and drag on the page.
- Copy it for everyone else
Copy and paste the first symbol for each person, so every symbol has the same size, and set the copies out in rows.
- Add the names
Select the Text tool or press Ctrl+2, and type each name and year of birth under its symbol, so the symbol stays clear for the marks of the notation.
- Join each couple
On the Home tab, in the Tools group, select Connector or press Ctrl+3. Drag from one partner to the other, then select the connector and check that both ends show green dots.
- Hang the children
Draw a line down from the middle of the couple line, a sibling line across, and a line to each child, with the oldest on the left.
- Line up each generation
Select the people of one row and choose Home, Arrange, Position, Auto Align & Space, or use Align for a single direction.
- Group the family
Drag a selection around the whole chart, then right-click a shape, point to Group and click Group, or press Ctrl+Shift+G.
Glued connectors keep a couple joined when one partner moves
Glue is what keeps a connector attached to a shape. Select a connector to check it. A glued connector shows green dots or circles at its ends, and an unglued one shows white or grey dots. Dragging one end away from a shape unglues that end only.
Microsoft describes two kinds of glue. A connector dropped on a connection point of a shape is static and stays on that point. A connector dropped on the inside of a shape, when a green border surrounds it, is dynamic and uses whichever point is most convenient. Dynamic glue suits a couple line, because after a partner moves, the line reattaches to whichever side of the shape is nearest.
Two limits matter for a genogram. Connectors join shapes on the same page only, so keep the whole family on one page. AutoConnect adds a new shape already connected, which suits a flowchart, but a child in a genogram hangs from a couple rather than from one shape, so draw those lines yourself.
Visio for the web draws the same shapes from the Insert tab
The pages these steps come from apply to Visio Plan 1 and to Visio Professional and Visio Standard from 2016 to 2024. In Visio for the web, open a drawing, select the Insert tab and choose Draw Shape to reach the Rectangle and Ellipse tools.
Microsoft has no desktop version of Visio for macOS. On a Mac, Visio for the web runs in Safari or Chrome with a Visio Plan 1 subscription. A lighter web app called Visio in Microsoft 365 comes with many work and school Microsoft 365 plans, though not with Microsoft 365 Personal or Family. The guide to making a genogram on a Mac compares it with the other ways to draw there.
A Visio genogram needs a key drawn on the page
Visio has no genogram key, so draw a small one in a corner with each symbol and line that the chart uses, and nothing else. Mark a death with an X through the symbol, and a divorce with two short slashes across the couple line. The genogram symbols guide shows each mark, and the guide to making a genogram explains the order in which a family is drawn.
Keep three generations unless the question needs more. Write the years on one short line under each name, and leave room beside a parent before you draw a second couple line.
The editor draws the genogram and Visio receives a picture
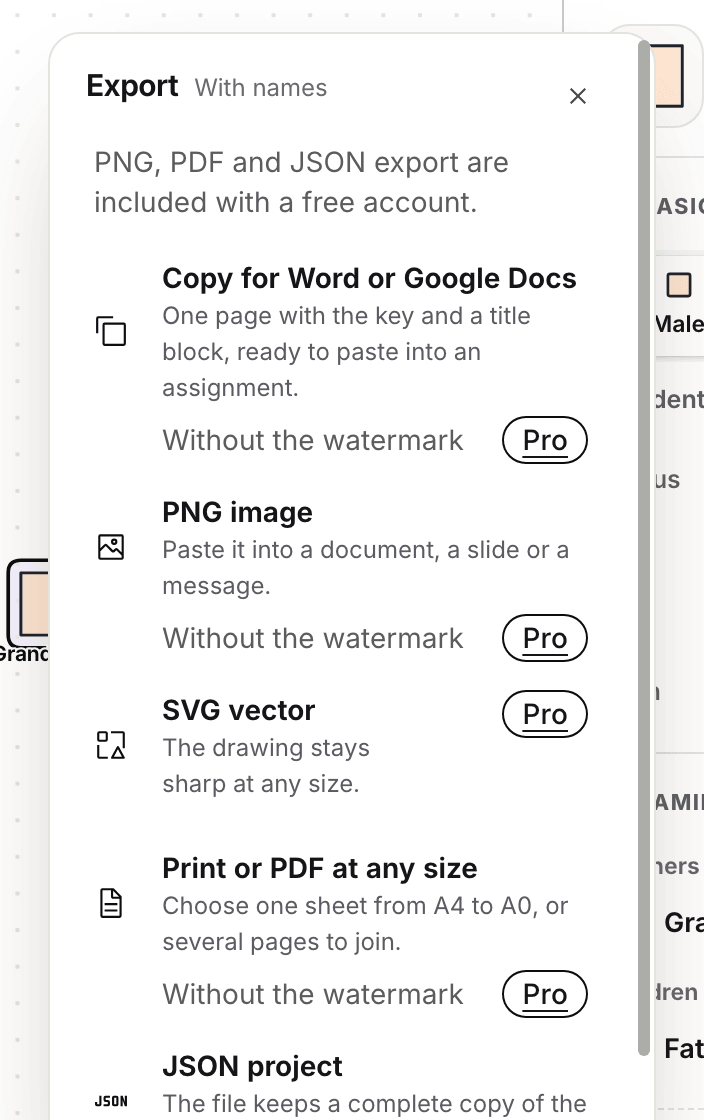
In Genogram Builder each new person is placed in free space on the right row, Arrange tidies the rows when you ask it to, and the key is written for you. Drawing needs no account. Exporting needs a free account, and the picture carries the Genogram Builder watermark unless you have Pro or Max, which also add SVG.
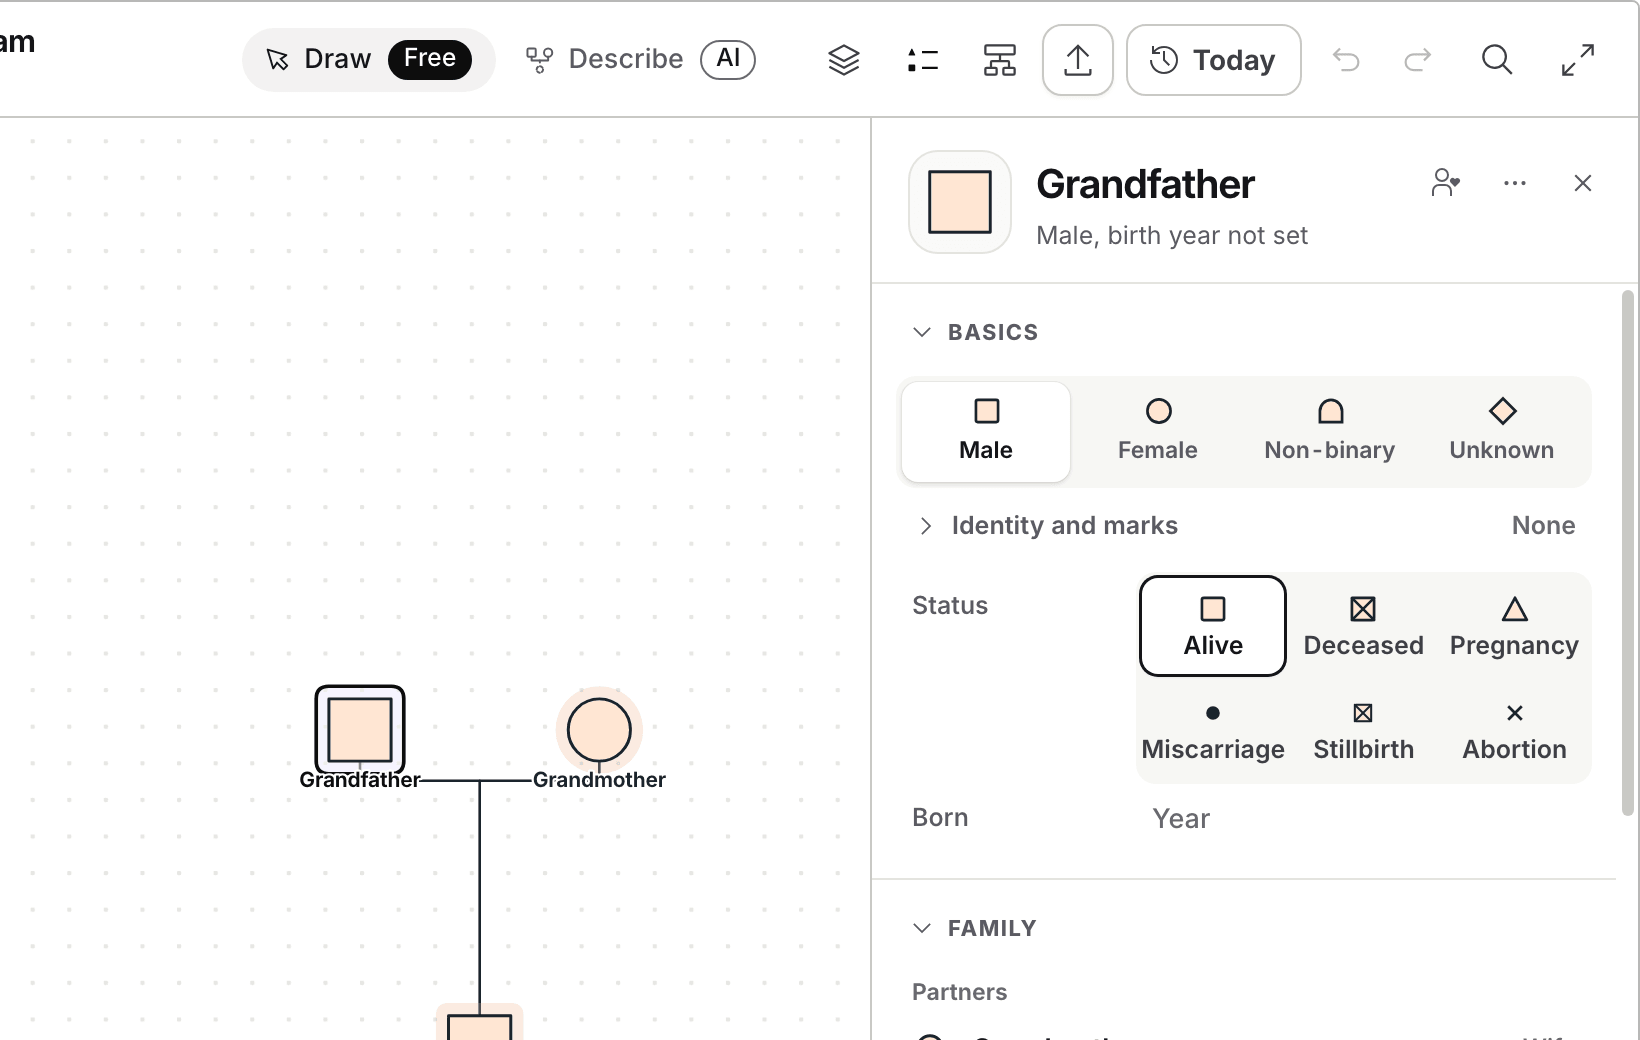
Open the blank three generation chart and select a person. Type the name at the top of the panel that opens, then set the status and the year of birth.
Open Export and choose PNG image, which the menu describes as a picture to paste into a document, a slide or a message.
Place the picture on the Visio page and keep the editor file for changes. To change a person, change the chart in the editor and replace the picture.
Common questions
Whether this site offers a Visio file
No. There is no VSDX file here. The blank three generation sheet downloads as a PDF and a PNG from the three generation template, and the editor exports PNG, PDF, SVG and a JSON project.
Drawing a family tree in Visio instead
A family tree shows descent only, and its boxes can hang one under another. A genogram needs couple lines and marks for deaths, divorces and relationships, which the shapes and connectors above draw.
Choosing between Visio and Excel
Use Visio when the chart is one diagram among others in Visio. Use Excel when it sits beside a table of facts. The Excel guide covers a worksheet.
Sources and methodology
We make Genogram Builder. We used the references below for this guide. Last checked on 5 November 2026.
- Microsoft Support, about Visio in Microsoft 365
- Microsoft Support, keyboard shortcuts for Visio
- Microsoft Q&A, genogram template in Visio
- Microsoft Support, featured Visio templates and diagrams
- Microsoft Support, draw a shape in Visio
- Microsoft Support, add connectors between Visio shapes
- Microsoft Support, glue or unglue connectors
- Microsoft Support, align and position shapes in a diagram
- Microsoft Support, group or ungroup shapes in Visio
- Microsoft Support, use Visio on a Mac
Type the names into the blank three generation template, then export the chart as a picture for Visio with a free account.
Start from the blank template